Jellyseerr Docker Setup Guide: Simple Requests for Jellyfin, Radarr and Sonarr
If you’re running a home media server with Radarr, Sonarr, and Jellyfin, you’ve probably wished there was an easier way for friends and family to request movies and TV shows, without giving them access to your entire server. That’s exactly where Jellyseerr comes in. It provides a simple, modern request interface that connects directly to your existing media stack and automates the entire workflow.
This guide assumes you already have a basic media server setup running in Docker (e.g., Jellyfin + Radarr + Sonarr). We’ll walk through a quick and clean Jellyseerr installation using Docker Compose, plus the small but important configuration steps to get everything working smoothly.
📑 Table of Contents
- 🛠️ Docker Compose: config setup
- 🔧 Initial Jellyseerr Setup
- 👥 Adding Users (Jellyfin Integration)
- 🌐 Exposing Jellyseerr Externally
- ✅ Final Thoughts
🛠️ Docker Compose: config setup
Jellyseerr runs as a lightweight Docker container and integrates neatly into any existing media stack. Below is a minimal but production-ready configuration you can drop into your current docker-compose.yml.
services:
  jellyseerr:
    image: ghcr.io/fallenbagel/jellyseerr:2
    container_name: jellyseerr
    restart: unless-stopped
    init: true

    environment:
      - TZ=Your/Timezone

    ports:
      - "5055:5055"

    volumes:
      - /docker/jellyseerr/config:/app/config
A few important notes:
image: ...:2pins Jellyseerr to major version 2.
You will automatically get minor and patch updates (like 2.7.3) without jumping to a future major release such as 3.x.- init: true improves container process handling and prevents zombie processes.
- All configuration data lives in
/docker/jellyseerr/config, so make sure this folder is included in your backup routine. - Port 5055 is the default web UI port.
Bring up the jellyseerr container:
docker compose up -d
🔧 Initial Jellyseerr Setup
Once the container is running, open Jellyseerr in your browser:http://<your-server-ip>:5055
You’ll be guided through a quick setup wizard. The first step is connecting Jellyseerr to your media server.
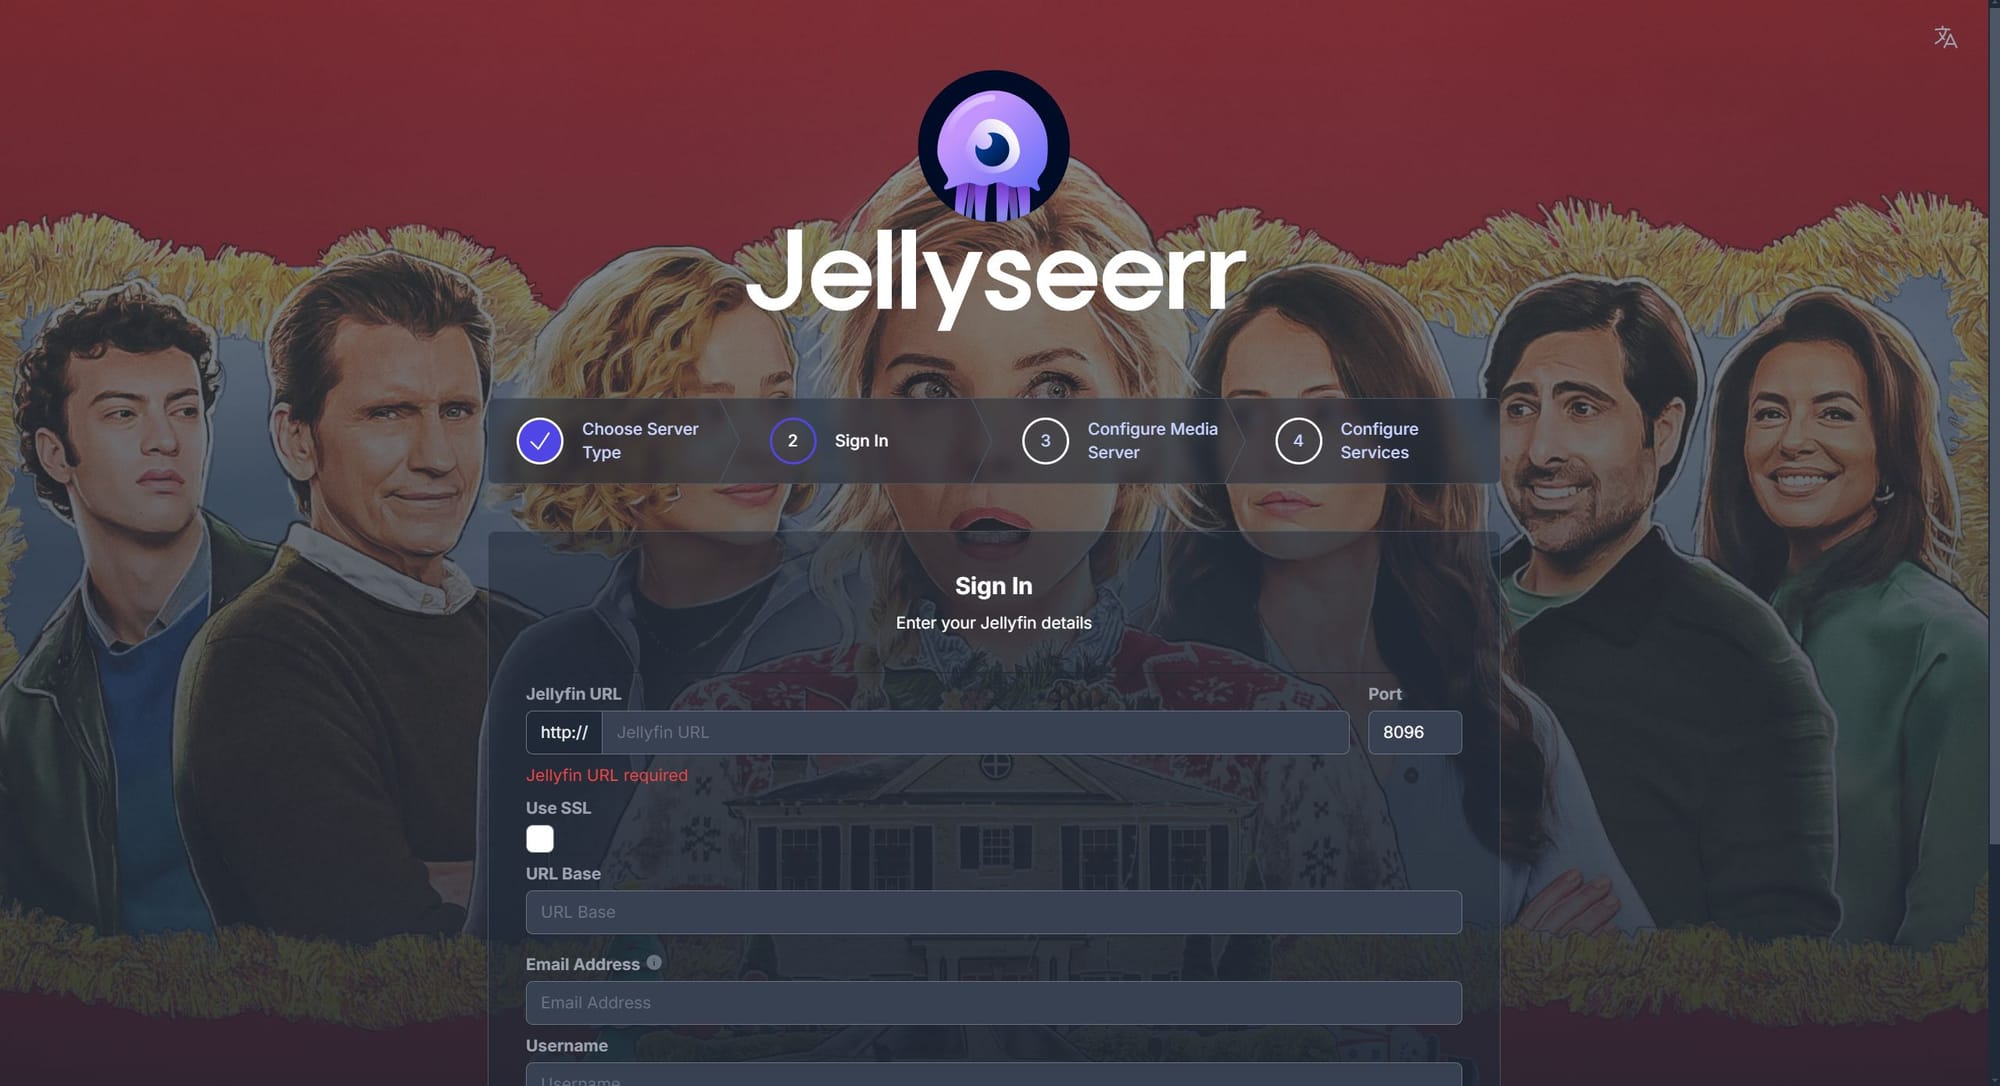
Connect Jellyseerr to Jellyfin
Use one of the following URLs:
- Using server IP:
http://<your-server-ip>:8096 - Using Docker hostname (same network only):
http://jellyfin:8096
Use a Jellyfin admin account for this step. Jellyseerr only needs admin access once to read your libraries and create an API token.
Connecting Radarr
Go to Settings → Services → Radarr and enter:
-
Hostname (Docker network):
http://radarr:7878Or fallback:
http://<your-server-ip>:7878 -
API Key:
Copy from Radarr: Settings → General → API Key -
Root Folder:
/movies -
Quality Profile:
Select your preferred profile. -
Default Server:
Enable “Use as default server” if you want Jellyseerr users to be able to send requests to this server.
Click Test to confirm the connection.
💡 Tip: Disable “Tag Requests” in Jellyseerr. Radarr only accepts lowercase tags (
a–z,0–9,-), and usernames with spaces/uppercase can break requests.
Connecting Sonarr
Go to Settings → Services → Sonarr and enter:
-
Hostname (Docker network):
http://sonarr:8989Or fallback:
http://<your-server-ip>:8989 -
API Key:
Copy from Sonarr: Settings → General → API Key -
Root Folder:
/tv -
Quality Profile:
Choose your preferred profile. -
Default Server:
Enable “Use as default server” if you want Jellyseerr users to be able to send requests to this server.
Click Test to verify. With both Radarr and Sonarr connected, Jellyseerr is ready to handle media requests.
👥 Adding Users (Jellyfin Integration)
Jellyseerr can automatically import your existing Jellyfin users, making it easy to give friends and family access to request movies and TV shows.
Go to:
Users → Import Users
Jellyseerr will pull your Jellyfin user list, and you can enable or disable request permissions per user:
- Can Request Movies
- Can Request TV Shows
- Require Approval
This is the easiest way to manage access since users can log in with their existing Jellyfin accounts.
🌐 Exposing Jellyseerr Externally
If you want users outside your local network to access Jellyseerr, you’ll need to expose the service externally. The safest and easiest way to do this is with Cloudflare Tunnel, which provides secure remote access without opening ports on your router.
I’ve already written a guide on setting up Cloudflare Tunnel, so follow that article to expose Jellyseerr with HTTPS protection and Cloudflare’s security features.
✅ Final Thoughts
Jellyseerr is one of the easiest and most user-friendly ways to handle media requests in a homelab environment. With just a small Docker container and a few quick integrations, you can give your Jellyfin users a simple interface to request new movies and TV shows, without exposing your full media server or managing requests manually.
Whether you run a small personal setup or share your library with friends and family, Jellyseerr fits neatly into any Radarr/Sonarr workflow and keeps everything organized. Once connected and exposed securely, it becomes a seamless part of your media automation stack.
If you're already running Jellyfin, Radarr, and Sonarr, adding Jellyseerr is a natural next step that improves your user experience with minimal effort.